Wednesday 5 April 2017

Animation Practice: Evaluation

For 
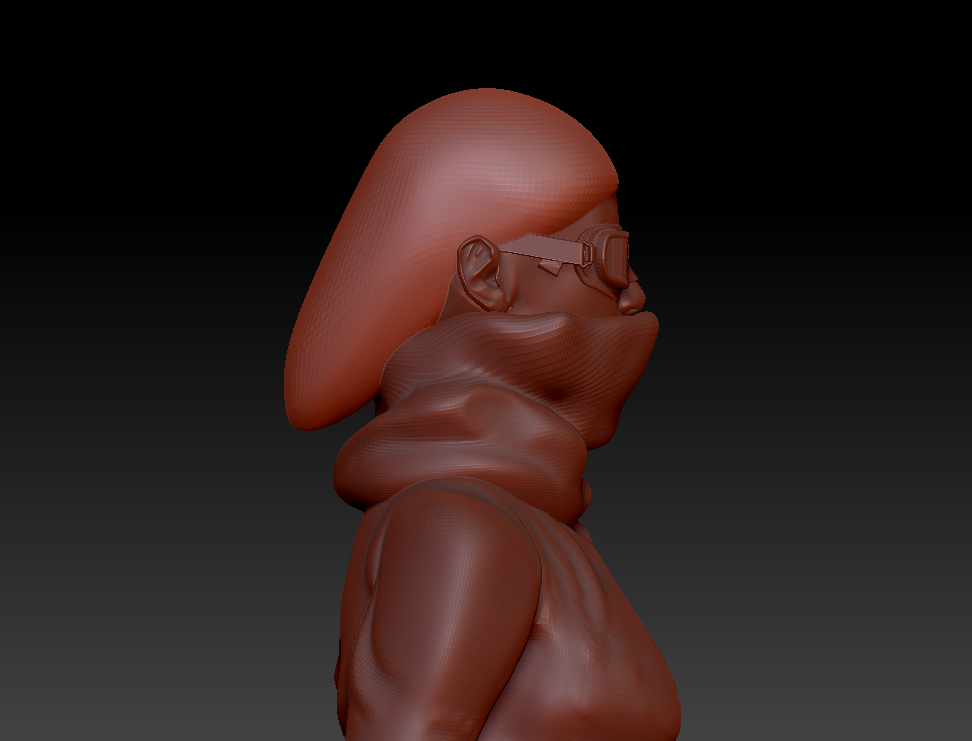
this project we were tasked with sculpting a character of our own design in ZBrush, from the concept stages up till rendering, documenting each step. The character we design should have a story and design that suggest they’re an anti-hero, a character who, while not a villain, exhibits negative or immoral traits or actions that makes them less heroic than a standard hero. We were also tasked for creating a prop for our characters that is relevant to their story or character.

I began by researching what an anti-hero is and using what I learned to factor into my designs for the character designs I created. Taking inspiration from numerous notable anti-hero characters in film and video games, I came up with a number of official concepts. Initially I spent more time than I would have liked trying to design a character that actually embodies the qualities of an anti-hero, so a lot of time was spent thinking of concepts that eventually would go unused.

 After designing a futuristic Sci-Fi smuggler, I decided to try other designs and eventually ended up with a character I believe to be far more interesting, a post-apocalyptic survivor. While I did like the concept of my original character, he was an anti-hero in his job only and in no other aspects, so I thought I should focus on creating a character who more closely exhibits those traits.

I made the choice to involve Autodesk Maya in the workflow, using it to create the base meshes for several parts of the sculpt. Using Maya for this purpose is considered industry-standard for hard surface modelling and game character creation and as such I saw this project as a chance to experiment and learn how to use both programs in the character sculpting workflow to increase efficiency and allow for the easier creation of hard-surface geometry.

This method would prove invaluable for modelling the character’s prop, a shotgun, and her numerous accessories such as belt buckle, boots, gloves and other items of clothing. Using this method was a learning experience and being able to use it and traditional ZBrush sculpting methods not only taught me how to use the program itself, but also gave me more experience modelling organic and hard-surface geometry and taught how the pipeline between Maya and ZBrush worked. I believe that ultimately this was a good decision as I learned a lot more through this process and learned how to overcome challenges that came about.

In conclusion, I am mostly happy with how this coursework turned out. I believe I managed to create a model of high quality and learned an immense amount about ZBrush and sculpting in the process while also practicing Maya modelling techniques. Had I managed my time more effectively I believe I could have made a more impressive model and character that further embodies the qualities of an anti-hero, as I feel like my final model doesn’t represent the concept of an anti-hero as much as I had wished it would. I would have also spent more time learning some of the many useful features of ZBrush, such as polygroups, that ultimately made the process so much easier, but could have saved a significantly saved time if I was aware of them when I was initially modelling the character. I believe the model itself could still be improved significantly and I made numerous mistakes, such as modelling the character with arms at the side and legs straight down, instead of in an A-Pose or a T-Pose, that ultimately made the process harder and more time consuming than it needed to be.


If I could try this project again I would use my time more efficiently, document my work more often, and ensure I don’t make the same mistakes I made this time that hindered me. I would have also made sure to spend more time in ZBrush and experimenting with the many tools available, as I often relied on Maya for creating geometry I couldn’t create as effectively in ZBrush at my current level of knowledge of the software. I would ensure I spend as much time as suitable to learn the program and it’s many systems to ensure I don’t need to rely on Maya as much and consequently allow me to spend as much time as possible in ZBrush, sculpting, learning and gaining more experience with the software.

Animation Practice: Final Character Renders and Turntable


1. General Renders

2. A3 Renders

3. Turntable Animation

1. General Renders


2. A3 Renders - Featuring both the character and the prop

A3 - 300 DPI


A3 - 300 DPI
A3 - 72 DPI
A3 - 72 DPI


Prop - A3 - 300 DPI


Prop - A3 - 72 DPI
3. Turntable Animation


Animation Practice: Character Background


Character name: Red (Real name: Erica)
Age: 26
Birthplace: England

A wandering, silent and vengeful killer that roams the lands of post-apocalyptic England. Known only by the name 'Red' given to her for her iconic red scarf that she is never seen without. In a post-apocalyptic world where civilisation is only barely forming, the only people who knew her real name were her friends and family who were killed or tortured when raiders attacked her village. During the attack she and other were taken hostage and tortured at the raiders camp. The last 2 people to be tortured, she managed to attack her torturer and escape with her sister, taking his gun and any ammunition she could find. Before she could get away, the raiders caught up with her, attacked her, left her for dead, captured her sister and drove away. While she survived, her tongue was cut out and her lower-face scarred, as such she refuses to ever take off the scarf that conceals her face.

Scarred by the events that took place, she aimlessly wanders across the country, killing any bandit she comes across without hesitation, even willing to shoot through a hostage if it means killing the person on the other side. The experience has left her cold-hearted and almost emotionless as she moves place-to-place, searching for any information as to where her sister could be, or if she's even still alive.

Animation Practice: Character Concept Art


When designing the character I had various wildly different ideas originally but eventually narrowed down a character I thought would be interesting. Ultimately I took elements from each design and integrated them into the final character design.

Space Smuggler concept:

Originally I played around with the concept of a sci-fi smuggler character wearing a futuristic hard-surface outfit. I tried different ideas for his head after as I was happy with his outfit but ultimately I felt like I could do something a little more interesting.


After deciding to try other concepts, I sketched some various, wildly different ideas for a character to see if anything seemed interesting. With another sci-fi character at the top right, I decided to go in the opposite direction and try a film noir approach with a detective character. While I was considering going with this idea and putting an interesting spin on the design, such as a film noir cop in the future, I decided to keep trying other ideas. This eventually left to the bottom left concept which I didn't fully flesh out, but later served as the basis for the design of my final character.


Continuing from the design previous, I tried drawing what I thought an interesting post apocalyptic protagonist would look like, in the same vein as Mad Max and other silent protagonists. This quickly led to the initial concept of a leather jacket-clad, red scarf-wearing female post-apocalyptic character. While I eventually decided to not give the character a jacket or coat, I went through different ideas for the clothing. 

As mentioned previously multiple elements from experimenting with the previous character designs made their way into this character's design. The overall lower body appearance of combat boots and trousers from the last page's last design served as the inspiration for her current design, albeit with vintage motorcycle boots replacing them. The two belts in the sci-fi concept also made their way into this design, with the 2nd belt becoming a shotgun shell belt and the scarf from the original sci-fi smuggler being used and made more important to the overall design.


With the character's design almost finalised, I began thinking of the prop and pose for the character. I quickly decided on her having a Ithica 37 shotgun. The weapon is commonly used in post apocalyptic video games and movies and has essentially become what we think of when we hear 'shotgun'. For the pose I drew two ideas, one a confident yet cold firing stance, as if about to execute someone, and the other a more relaxed pose of her smoking while sitting. I eventually decided to use the first pose as I felt like it would show more of the character, without boxes obscuring her, and also because it shows more of the character's anti-hero personality.


The final pose

Animation Practice: Development and Experimentation

For this project I decided to model parts in Maya and then flesh them out in ZBrush to ensure everything would be proportional and, considering the amount of hard-surface elements, would look how they should. A majority of the project was done in ZBrush still, but Maya was invaluable for quickly and efficiently creating the low-poly, detail-lacking base meshes for various parts, especially the more complicated parts like the belt buckle.

I first began with the base mesh. This would be the underlying body mesh of the character that I would use to rough out the proportions, shapes and topology. While I originally planned on using ZSpheres, I decided to go with this approach as it would be more useful further on when I needed to make clothing and accessories.

Thanks to the GoZ tools included in ZBrush, moving the models between Maya and ZBrush is fast and efficient.


The first iteration of the mesh, while the image planes aren't visible, I made sure to follow reference images to ensure realistic proportions were achieved.

A majority of the time spent modeling was done with smooth mode on, to make sure the mesh would look fine in ZBrush and be an appropriate base for the rest of the clothing.

Once the base mesh was finished I began using it to create the mesh for clothing by duplicating the polygons from the base mesh. This ensures the topology is inherited from the base mesh and makes create of clothing far easier.
Basic mesh for the trousers, belt and top.
A screenshot of the first model sculpted in ZBrush, the top.


Initial model of the boot and it's various parts.
Thanks to using Maya in the pipeline, creating multiple elements suchs as the belts and zips on the boots was quick and easy and allowed ideas and concepts to be tested quickly with a rough representation of what it may look like in the final sculpt.

Boots and trousers imported into ZBrush.
The boots after having details sculpted on.

Folds sculpted onto trousers with leg bandage and belts added

For this project I decided to include a shotgun as the prop of the character, I chose to model the Ithica 37 and tried two different versions, one with a longer barrel and one with a shortened one. I eventually ended up using the shorter barrel one.


After modelling the head mesh and importing it, I used ZBrush to sculpt a thick scarf and Maya to model the goggles

For the hair, I hadn't made a final decision on whether to have her hair tied back like in the original concept or to have it down to her shoulders as seen in one of the concept drawings I did. To experiment I tried creating the long hair and seeing how it would look.


While I think the result was good, I also made another version of the hair but tied back, and compared.


I prefer the tied-back look and decided to use that in the final sculpt instead, but the original hair was helpful for experimenting with the tools I'd use for the final hair.

The final model, featuring the finished scarf and the additions of gloves and shotgun shells to the 2nd belt.

POSING

With the model finished, it was time to pose the model. Using the ZBrush Transpose Master plugin included with the software, I was able to pose the model without merging everything into one model.


The plug in temporarily merges the subtools to their lowest divisions and merges them, from there I seperated the different parts of the model I'd pose into their own polygroups and from there rotated them into position.


Once done with posing I had let the plug in automatically reflect the pose onto the original tool, all that was left was to clean up the stretched geometry and pose the fingers and the prop.
Before adjustments - Low Divisions
After adjustments - High Divisions


With the character posed and a few adjustments made, all that was left to do was render.


RENDERING

ZBrush features a robust renderer that gives the user an incredible amount of control over various rendering elements such as ambient occlusion, ZDepth and many more variables.


From the Render Properties menu elements can be turned on and off, allowing for more or less detailed and calculated renders.


The BPR RenderPass menu lists the various maps generated when the model is rendered. These maps are incredibly powerful for fine tuning things such as depth of field and shadow strength to the user's preference later on.

These maps can then be individually exported from this menu and used in programs such as Photoshop.


Importing these channels into Photoshop allows the user to alter elements such as Shadow strength and Depth of Field in real time, without having to re-render after every change, like if they were to make these changes in ZBrush itself. This workflow is an invaluable way to fine-tune renders and achieve the results with real-time feedback and not down-time between changes.